A-Pillar Cover Remove and Install for the
Mitsubishi 3000GT and Dodge Stealth
by Jeff Lucius
Introduction
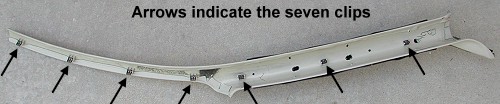
In the service manual, the A-pillar cover is referred to as the "front pillar trim". The front pillar trim is flexible, molded ABS plastic covered with soft, textured vinyl plastic. The A-pillar cover is held in place only by seven clips. This cover is removed for the following reasons.
- Cleaning, replacement, or sale.
- Installation of gauge pods.
- To remove the headlining.
- On the driver's side, to access the wires for the vanity and dome lights.
- To run speaker wires (to avoid power wires along the cowl side trim at the base of the door opening).
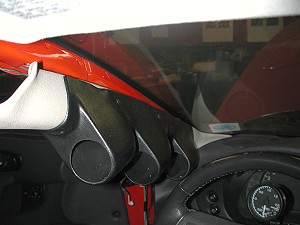
These instructions supplement the service manual's instructions for removing and installing the A-pillar cover. Please read all of these instructions before beginning this operation. The only tool you need is a Phillips screwdriver. The example A-pillar cover shown here already has gauge pods installed. However, removal and installation is the same whether pods are installed or not.
Removal
1. Driver's seat. Move the driver's seat as far back as it will go. Recline the back.
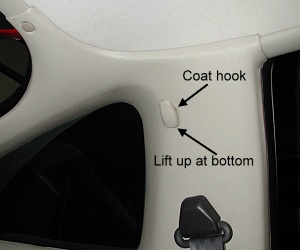
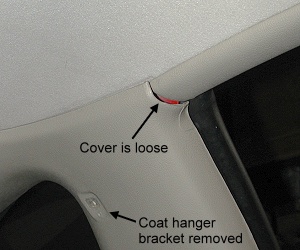
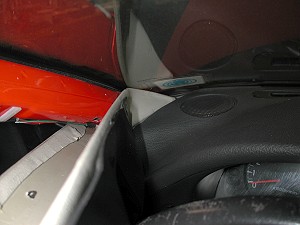
2. Coat hook and upper quarter trim. Clean your hands to remove dirt and grease. Removing the A-pillar cover is easier if the front upper corner of the upper quarter trim is loosened first. Remove the cover on the coat hook above the rear seat buy lifting on the bottom of the cover. Use a Phillips screwdriver to remove the coat hook bracket. Pull on the front upper corner of the panel to loosen it; there is the one clip there.
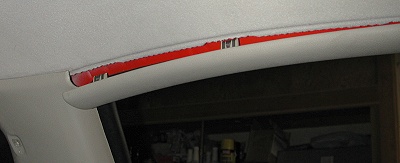
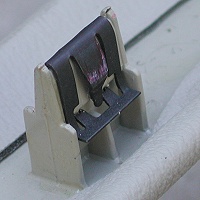
3. Loosen A-pillar cover. Gently pull on the A-pillar cover and bend it around the upper quarter trim. Working from the rear towards the front, grasp the A-pillar cover and pull it away from the metal car body. There are seven clips that hold it into place. After all the clips are away from the car body, pull the cover down and toward the rear of car to extract it from under the front dash. After the cover is completely removed, retrieve any clips left in the body and snap them back onto the A-pillar cover.


Installation
Installation is basically just the reverse of the removal steps. Start by inserting the tip of the cover into the opening at the corner of the dash. Push the cover forward into the dash. Raise the back up and slide it under the upper quarter trim. Align the clips with the insertion holes. This should rotate the front tip into the correct position. If not, start over. Press on the A-pillar cover and be sure all seven clips snap into place. Put the coat hangar hook back together. Re-position the driver's seat.
Page last updated June 3, 2003.