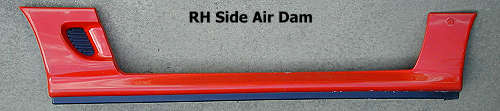
Side Air Dam Removal
on the Mitsubishi 3000GT/Dodge Stealth
by Jeff Lucius
Introduction
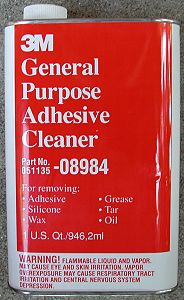
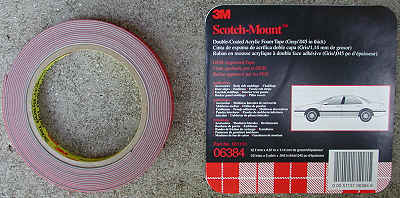
These instructions are for removing and installing the side air dam on my 1992 Dodge Stealth. Read all of the instructions and look at all of the pictures before you begin. The tools required for removal are a #2 Phillips screwdriver, 8-mm wrench, 8-mm socket (deep), 10-mm socket, socket ratchet with 3" and 6" extensions, pliers, jack and jack stand(s), fishing line (if needed), and some rags. If you replace the sealant on the side air dam, then you will need some adhesive cleaner (such as 3M General Purpose Adhesive Cleaner Part No. 051135-08984), some double-coated foam tape (such as 3M Scotch-Mount Double-Coated Acrylic Foam Tape Part No. 051131-06384), and a small knife. I either replace screws and bolts in their holes after a part is removed or I use plastic storage containers or bags to keep the little parts sorted and not lost.
Pre-Removal
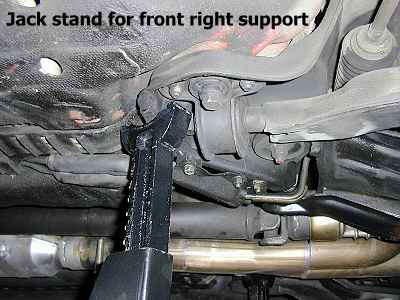
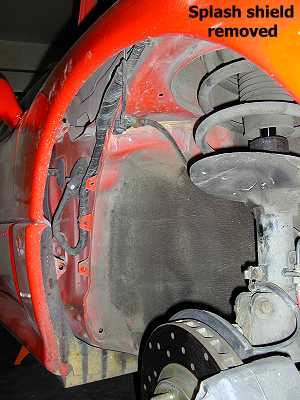
You must remove the quarter trim panel inside the car (instructions are at j6-2-qtr-panel.htm). You also must remove the "rear" front splash shield so you must remove the front wheel. I recommend a jack stand support location in the picture below.
Removal
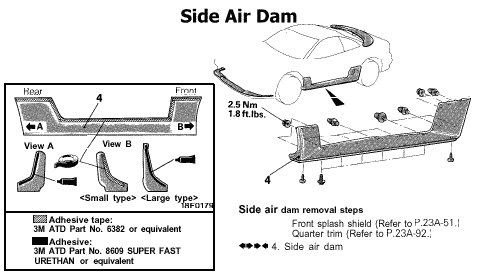
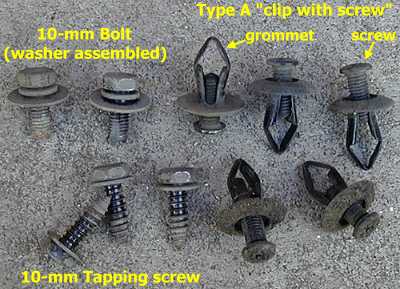
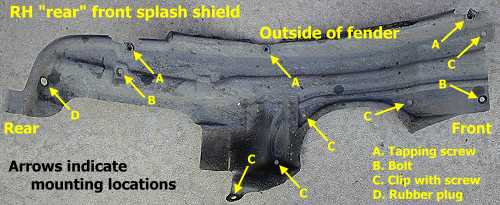
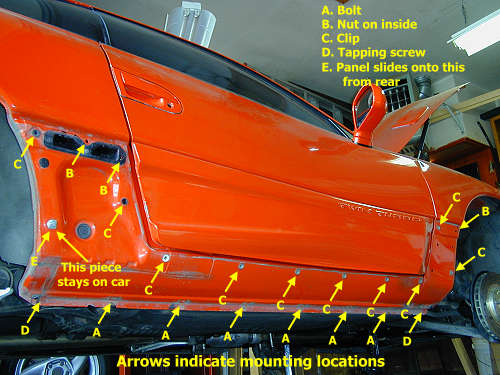
1. Front splash shield. Remove the three tapping screws. Remove the two 10-mm bolts. Remove the five clips with screws. The clips with screws are removed by uncsrewing the screw part a little then pulling the whole clip out. If the screw does not want to back out, then try putting a little upward pressure on the grommet by lightly prying around the base with a small screwdriver. Remove the rubber plug by pulling out on the shield a little. The pictures indentify all the locations. Remove the splash shield.
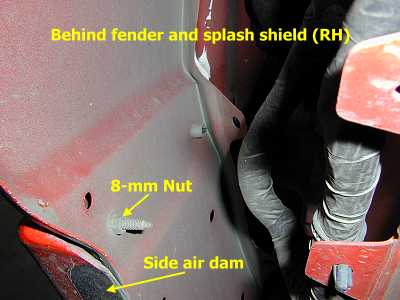
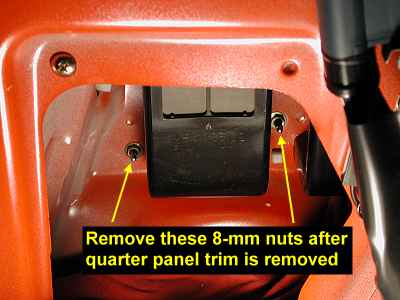
2. Mounting nuts. The side air dam is fastened in part by three bolts that protrude through the car's body panels. Remove the nuts from these bolts. One nut is behind the splash shield. The other two nuts are under the quarter trim panel that you removed. An 8-mm wrench or 8-mm socket can be used on the one behind the splash shield. You may need a deep 8-mm socket for the two nuts behind the quarter trim panel. I used some duct tape to fasten my short 8-mm socket partly to the extension to remove the two nuts. Be sure to stuff some rags in the panel below the nuts to help prevent loosing something in the bodywork.
3. Side air dam. Remove the screws and bolts. Locations are shown in the picture below. Now start at the front of the dam and pull out on the piece to release the clips. You may need some fishing line to cut through any strong adhesive that was used on the front and rear edges. When you get to the back of the dam, you will have to slide the dam to the rear to slide it off one clip (see the picture below). That clip stays in the body of the car. Done carefully, nothing should have broken.
Installation
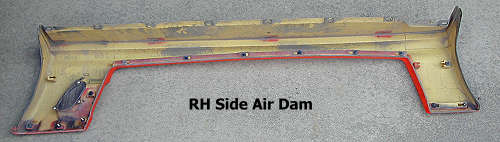
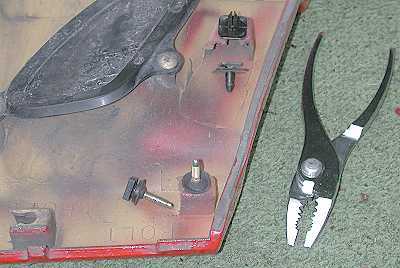
1. Transfer mounting parts. If you are replacing the side air dam, select the best mounting parts and transfer them to the new air dam. Using pliers, the parts slide easily in their mounting groove moulded into the air dam.
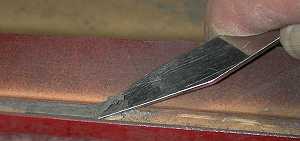
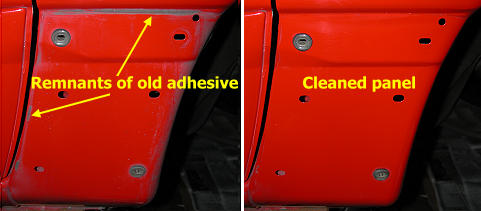
2. Prepare surfaces. If you are not just re-attaching the old air dam, then remove the old glue and adhesive tape from both the body panel and the air dam. I used 3M adhesive cleaner and lots of rubbing with a rag to remove the tape from the body panel. Use this cleaner cautiously. Wear eye protection and protective gloves, and work in a well-ventilated area. Read the directions and cautions on the container labels. This stuff is very flammable and toxic. This cleaner also removed some paint (similar to a polish, leaving a slightly dull surface) so only use it where the air dam will cover the body panel. I used a pocket knife to remove the tape from the air dam then cleaned the surface with the 3M adhesive cleaner. You can also clean the outer, painted side of the air dam if it needs it, with regular car wash of course.
3. Practice fitting the dam. Before proceeding, it may help to practice fiting the air dam to the car. Start at the back and work forward. It can be a bit tricky to align the rear mounting points and slide the dam onto the clip that remains in the car body. You will need to flex the air dam a little to get it to slide onto the clip. Be sure that clip is rotated to best recieve the air dam.
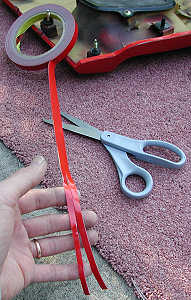
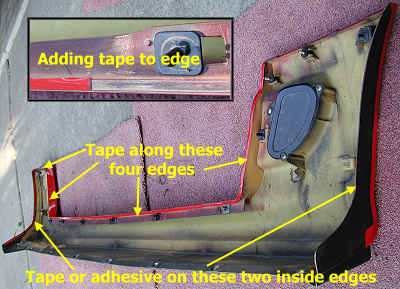
4. Add tape. The manual says to use 3M 6382 double-coated (adhesive both sides) foam tape. All I could find was 6384 tape which is 1/2" wide (by 5 yards long and 0.045" thick; 12.7mm x 4.57m x 1.14mm), so I cut the tape in half lengthwise into manageable strips. Leave the protective film on the one side and apply the tape to the four edges of the air dam shown in the picture below. There is a small lip along the edge to butt the tape against. You need about 8 feet of tape for each side air dam. The manual says to use an adhesive (rather than tape) along the front and back edges that are inside the wheel wells. I decided to just use the foam tape, which also seems to have been used by the factory when I cleaned the panel.
5. Attach the air dam. Before attaching the air dam to the car I removed the protective film from the rearmost vertical surface of the air dam. For the rest of the foam pieces I peeled back the film at one end of each applied strip to make it easy to remove the film once the panel is close to being attached to the car. You could also remove all the protective film if you are confident that you can attach the air dam with no problems. A utility knife can help to seperate the film from the adhesive coating. As you have already practiced, start attaching the air dam at the back and work forward, snapping the clips into place. Flex the air dam a little to slide it onto the clip that remained in the car body. Remove the protecive film from the tape as you go. Press along the edges to secure the tape to the car body.
6. Mounting nuts and bolts. Add the 2 screws, 6 bolts, and 3 nuts to finish securing the air dam to the car. Note that the three nuts only require about 2 ft-lb of torque.
Post-Installation
Install the inside quarter panel trim and the back front splash shield. Put the front wheel back on and lower the car.
Page last updated March 17, 2002.