Raising and Supporting
the Mitsubishi 3000GT/Dodge Stealth
by Jeff Lucius
Introduction
When the car is raised off the ground you must be absolutely sure that the car is stable and safe to work under and around. This "tip" page shows the methods I use to raise and support my Dodge Stealth Twin Turbo. I have used these procedures many times. The ramps themselves, and the ramp technique, have been used on each of my vehicles for the last 25 years without incident or accident. I think it is one of the safest ways to raise the vehicle enough to work under. Supporting our cars on jack stands is considerably more dangerous and extreme safety and caution must be observed always to prevent personal injury. Please note that I am not encouraging you to follow any procedure I show here. I am just showing you what works for me. I do not assume or infer any liability for any consequence, damage, or injury that may result from you following or attempting to follow the same procedure. For additional jacking instructions, please take a look at John Adams' web page at http://www.vr4stealth.com/jacking_instructions.htm.
For working in your garage, leave the emergency scissors jack in the rear storage compartment and use a good quality 3-ton hydraulic jack. A 2-ton hydraulic jack is minimally qualified for lifting duty. However, for tight spaces the 2-ton jack may be more convenient than the much heavier and larger 3-ton jack. For jack stands, I have two 5-ton stands, two 3-ton stands, and four 2-ton stands.
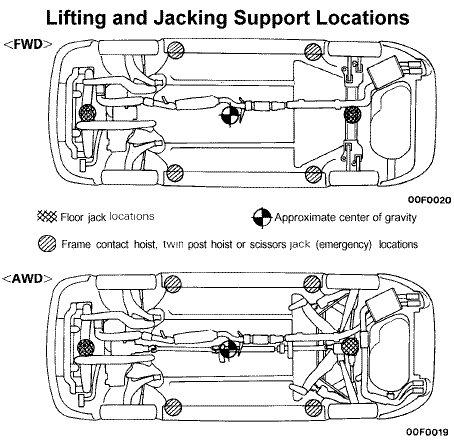
Lifting and jacking support locations
The picture below from the service manual shows the factory locations for lifting and supporting the car. For emergency jacking, there are jack "recepticles" located along the body sills to accept the scissors-type emergency jack supplied with the car. Fit the emergency jack to the metal ridge that runs under each side of the car. Do not attempt to use a plastic part to jack or support the car. Always block the wheels on the side of the car not being jacked and jack on a level surface. Do not attempt to work under the car when it is supported solely by one or more floor jacks.
Ramps
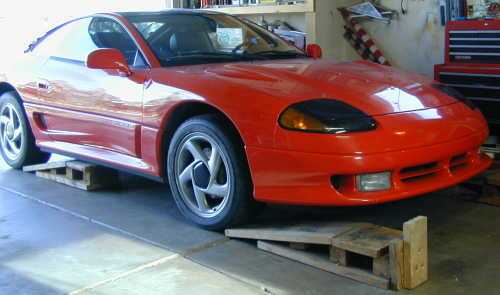
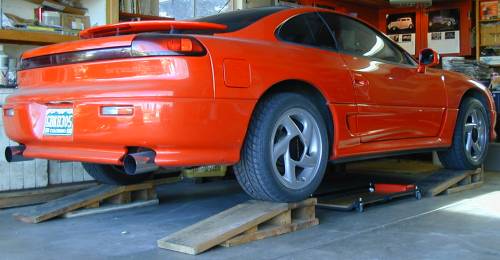
The ramps are made out of 2"x10" and 4"x4" pine boards. The front ramps have a 2"x6" block bolted to the front to act as a stop. The rear ramps must be built short enough to slide under the sides of the car. These pictures show my Stealth at the stock suspension height and the 6"-tall rear ramps barely fit. After the car is on the ramps and the engine is off, be sure to leave the transmission in gear (or Park for an automatic) and set the emergency parking brake. This 6" lift was enough for me to replace my entire exhaust system, from downpipe to tailpipe. This height is not enough, however, to allow removal of the transmission for example. Also, the wheels cannot be removed (of course) with this method.
After I lowered my car about 1" using the Ground Control adjustable height springs, I could no longer drive the car up onto these ramps. Now when I want to work under the car and have all 4 tires supported I do the following. Using my 2-ton jack under the side sill metal ridge (see next section) I lift the right side of the car a little. Then I use my 3-ton jack under this ridge to lift both right-side wheels off the ground at the same time. I slide the ramps under the tires and lower the car down onto them. Then I repeat these steps on the left side. When finished, I lift the car as before, remove both ramps on one side at the same time, and lower that side of the car to the ground.
Jacks and Jack Stands
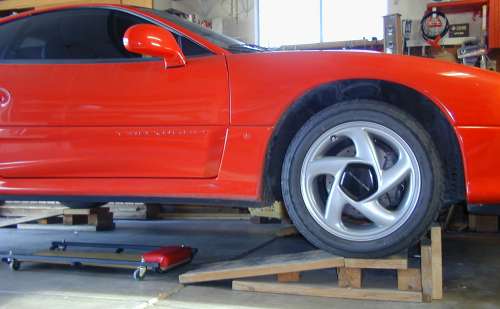
I have used both the emergency scissors jack and my floor hydraulic jack on the side sill metal ridge to raise the car. And I never liked doing it. When the jack is placed properly, both wheels on one side of the car will raise off the ground (which is very nice if this is what you want). At this point a block or a ramp can be placed under the wheels for support or jack stands can be used on the side sill ridge, with or without a block of wood.
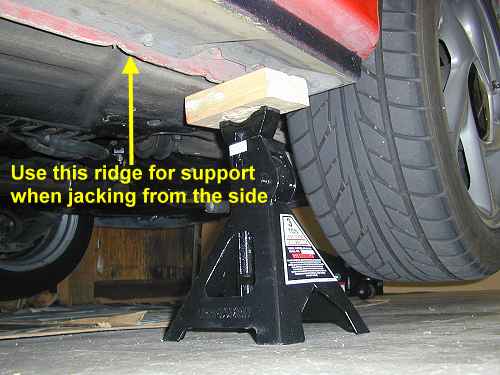
I do not recommend using the side sill ridge for long-term support. There are stronger and more secure locations. The support locations shown below are also what John Adams recommends on his web page. It takes a bit of work to place the stand so that it does not touch nuts, bolts or underbody panels.
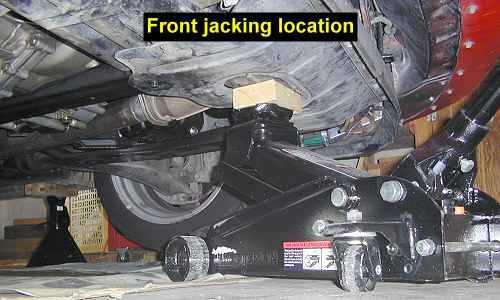
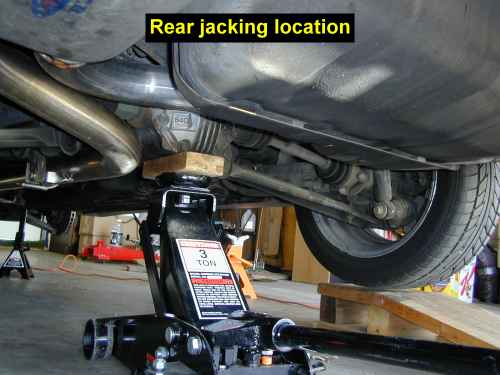
Mitsubishi provides a very convenient and strong front jacking location on a frame cross member in front of the car. This spot can be used with the car sitting on the ground. The rear jacking location is the rear differential for AWD models and a frame cross member for FWD models. I have not been able to use my hydraulic jacks under the rear differential when the car has been sitting on the ground. There is no room to operate the handle. The scissors jack might work, but I have not tried it. To use the rear jacking location, I place the car on the ramps first.
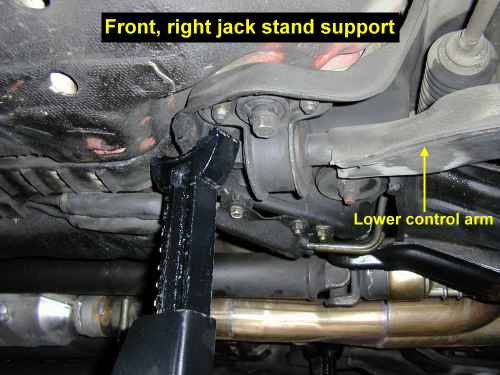
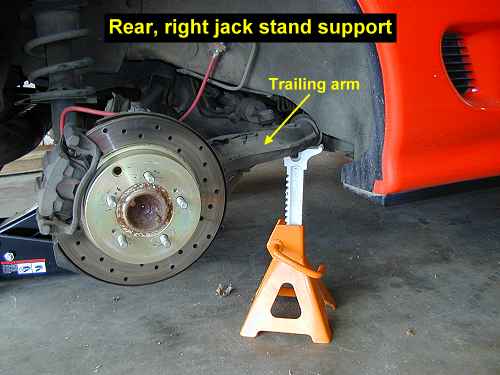
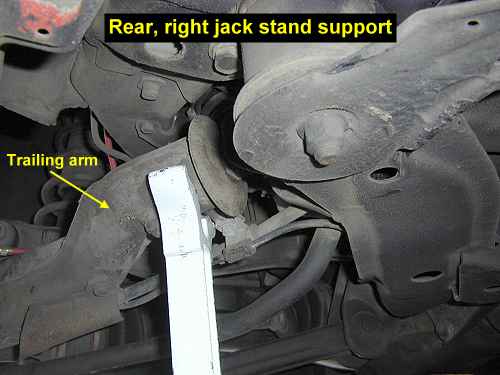
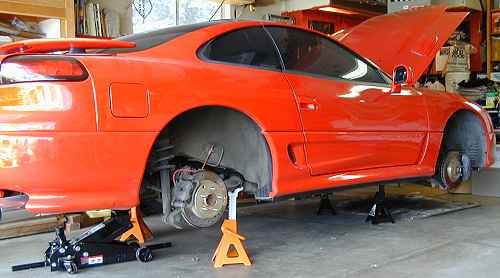
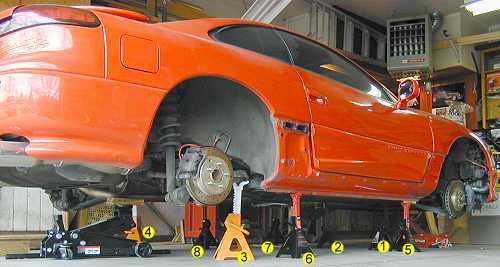
When I need to remove all the wheels, I first drive the car up onto the ramps and loosen the lug nuts. Then I use the front jacking location to raise the front wheels off the ramps and remove the wheels and ramps. I then lower the car onto two jack stands located under the frame member that the lower control arms mount to. I use the rear jacking location to raise the rear wheels off the ramps and remove the wheels and ramps. I place jack stands under the front of each trailing arm. For addition safety and security, I place two jack stands under each side sill, using shims if I have to. That makes 8 jack stands under the car. I have worked for weeks in, on, and under the Stealth using "only" these 8 stands for support. I removed the jacks after the pictures below were taken.
Page last updated December 14, 2003.