Cusco Rear Shock Tower Bar Installation
in the Mitsubishi 3000GT/Dodge Stealth
by Jeff Lucius
Introduction
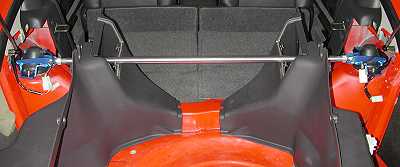
These instructions are for installing the Cusco "strut" bar in the Dodge Stealth or Mitsubishi 3000GT. For models with a sunroof holder, you may have to improvise a little. Of course, the 3000GT/Stealth does not have struts in the rear suspension, it has shocks. The Cusco bar should be called a "shock" bar. In any case, the bar provides a strengthening support between the tops of the rear shock towers. When I installed the bar, I had already removed the three rear storage compartment trim panels for other reasons. These instructions reflect that. I have read that the bar can be installed with the trim panels in place and only the small access cover to the shock tower removed. The tools required are 1/8" slotted screwdriver, Phillips screwdriver, pliers, 14-mm socket and wrench, a 21-mm wrench or adjustable wrench, a torque wrench, and a utility knife.
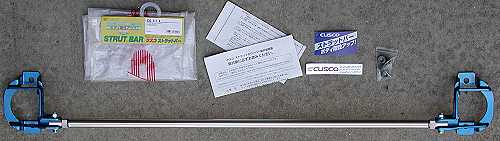
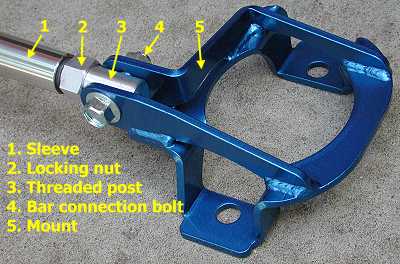
The Cusco Strut Bar consists of an adjustable T-6061 forged aluminum bar (or sleeve) with two SUS-304 stainless steel, TIG-welded, anodized brackets, which mount to the upper shock mounting bolts. The bar adjusts by rotating the sleeve on its threaded posts. The sleeve is locked into place using a nut on each end. The "kit" contains the bar, new mounting nuts, instructions in Japanese, and a window sticker proudly proclaiming "Motor Sports requires advanced technique and perfect durability. There, Cusco the real motor sport parts was born and trained. Now for people who are concerned with cars, feedback from the competition feelds [sic]." I am sure the original Japanese words make more sense than the English translation. Despite the literature, the bar is of excellent quality and fits perfectly.
Installation
1. Gain access to the top of the shock tower. As I mentioned, I had taken the trim panels off for other reasons so the top of the tower was already exposed. What you need to be able to do is to remove the mounting nuts that secure the top of the shock to the car body. You can first try to do this by removing the small panel that is located on each side trim panel and using a socket wrench or box-end wrench. If you cannot loosen the nuts this way, then you will have to remove the trim panels (backmost one must be removed first) to exert better leverage. I have instructions for the rear trim panel removal at this link 2-rearstorage.htm. After the first installation I had to remove the Cusco bar in order to remove the rear shocks. I could not find a practical way to remove the upper mounting nuts with the tools at hand by removing the small access panel. I again removed the rear interior panels to gain access to the bolts.
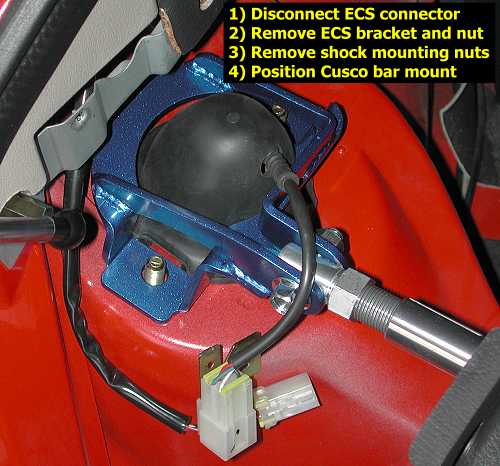
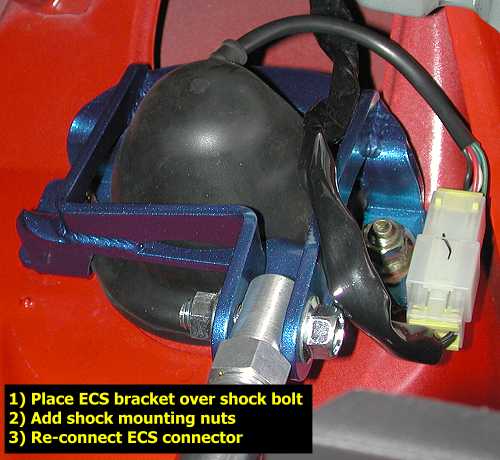
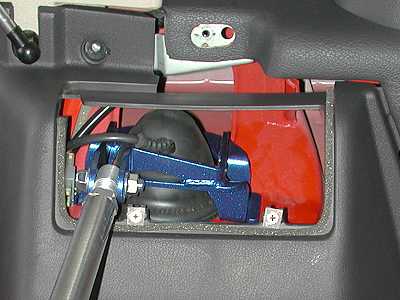
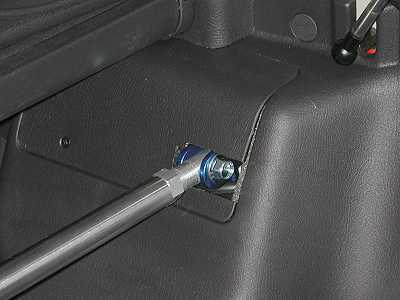
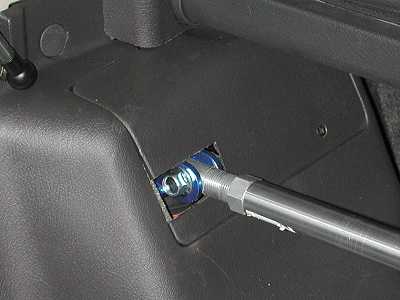
2. Attach the bar mounts. Disconnect the ECS connector (if your car has the electronic control suspension) using the release lever on the connector. Remove the three 14-mm nuts on shock upper mounting bolts (only two nuts if no ECS). Rotate the rubber cover on the shock tower so that the flat places along the edge are near the two mounting bolts. If you did not remove the side trim panels then remove the Cusco bar connection bolts so that each Cusco bar mount can be installed separately. If you removed the side panels slide the entire between the panels as shown in the picture below. In both cases, slide the ECS connector through the mount and carefully place the mount over the rubber boot onto the bolts. I mounted the bar so that the bar itself is toward the back. Others mount it so the bar itself is toward the front. The difference is in how the cover panel is cut out. Put the ECS bracket back onto the rear bolt. Put the two nuts back on; torque to 33 ft-lbs (45 Nm). The third nut for the ECS no longer fits. Though Cusco supplies new nuts, I re-used the old ones. Re-connect the ECS connector. If you separated the bar from the mounts, put them back together again; align the bolts so that the nuts go on from the "rear" side (unlike the pictures show here). If you removed the trim panels, put them back on. Rotate the outer sleeve on the bar until the proper "tightness" of the bar is achieved. I don't know what this is supposed to be. I just made mine as tight as I could by hand. Tighten the lock nuts against the sleeve with a 21-mm open-end wrench or a large adjustable wrench.
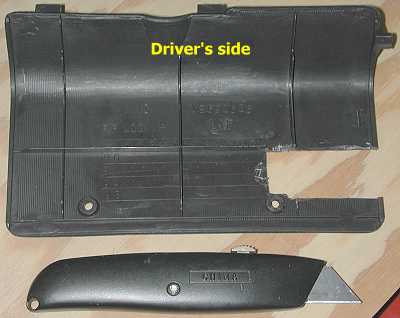
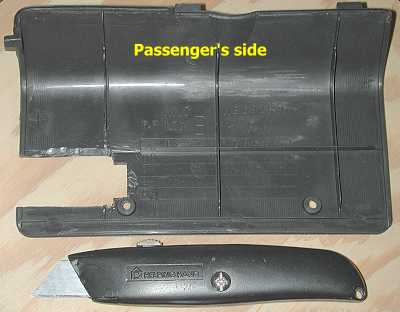
2. Cut out openings in the covers. Carefully plan how to cut the covers so that the covers clear the bar. Use a utility knife or similar razor-sharp tool. Try to cut from the back as much as possible. To minimize the amount of material completely removed, I back-cut the plastic for the tightest fit. Screw in the cover when finished.

Page last updated June 6, 2002.